Assets
You can’t protect what you can’t see. The Asset Directory is your inventory of everything worth securing — laptops and servers, domains, cloud and SaaS services, and software — each with an owner, a criticality, and a risk picture.
The asset taxonomy
Section titled “The asset taxonomy”786 Cyber groups assets into clear categories so your inventory stays tidy:
| Category | Examples |
|---|---|
| Endpoint | Laptops, desktops, mobiles |
| Hardware | Servers, network appliances |
| Network | Firewalls, switches, routers |
| Software (on‑prem) | Installed applications |
| Software (cloud) | SaaS services |
| Domain | Your internet domains |
| Cloud | Cloud accounts and resources |
Adding your assets
Section titled “Adding your assets”Like people, assets can be added three ways and mixed freely:
1. Sync from Microsoft 365 or Google
Section titled “1. Sync from Microsoft 365 or Google”Connect your directory and device data flows in automatically — the fastest way to seed endpoints and the accounts behind them.
2. Import a CSV
Section titled “2. Import a CSV”Use the same 4‑step Import Wizard you use for people:
- Upload your CSV.
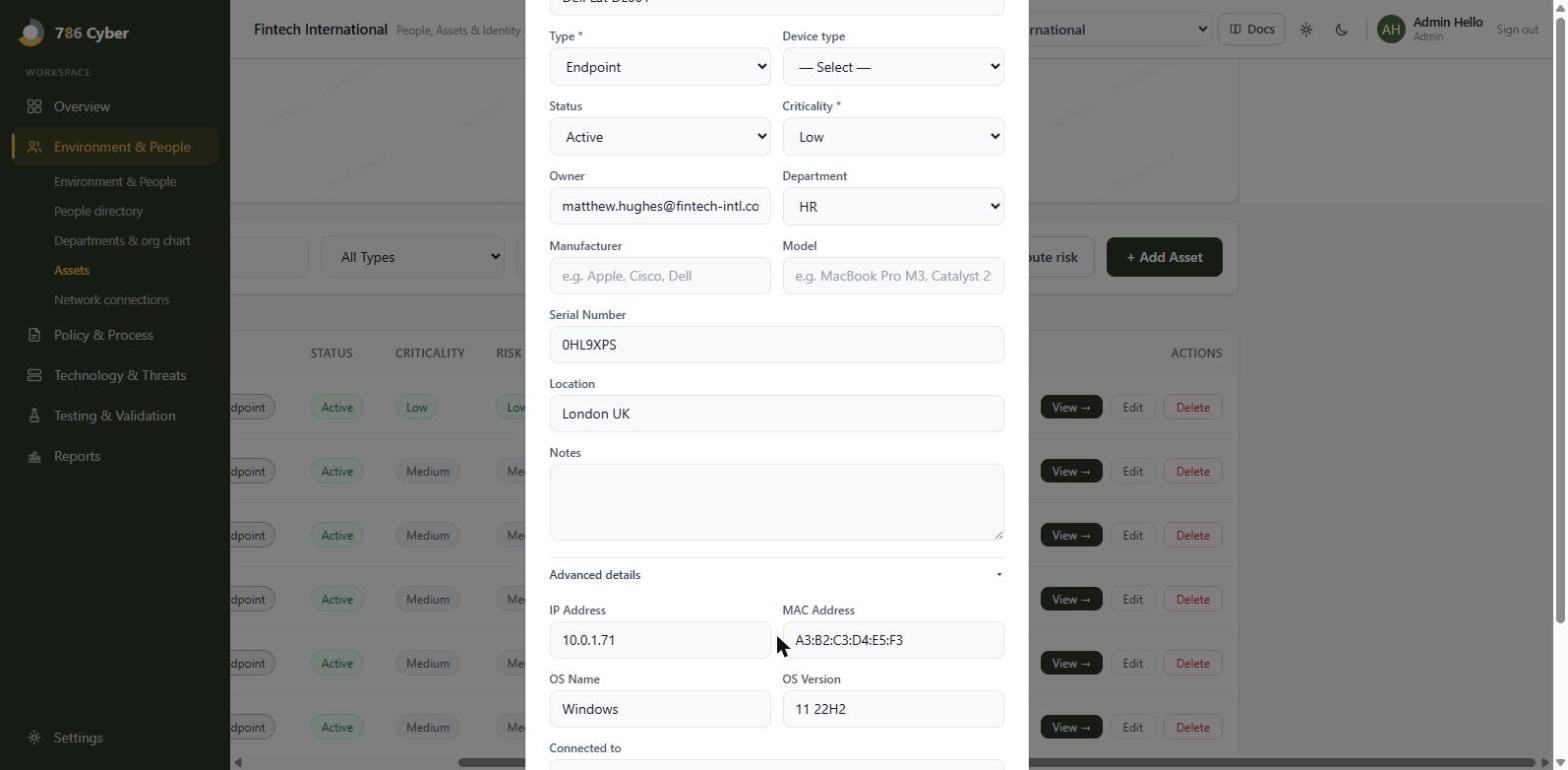
- Map columns to asset fields — including criticality, owner, department, serial number, manufacturer/model, and OS name (under Advanced details).
- Validate every row before saving.
- Import, with the same 24‑hour rollback safety net.
The same fuzzy‑matching that protects your people import protects this one: departments named in your asset file are matched against departments you already have (so a spreadsheet full of “IT”, “I.T.” and “Information Technology” doesn’t fragment into three departments), and validation surfaces bad rows — missing owners, malformed fields — before anything is committed. Combined with the 24‑hour rollback, that makes a large asset import from an old spreadsheet or a legacy tool export safe to try rather than something you have to get perfect first time.
3. Add an asset manually
Section titled “3. Add an asset manually”Use Add asset and complete the form. Advanced fields (OS name, serial, manufacturer, model) live under Advanced details.
Migrating from an RMM, CMDB, or another asset tool? Native RMM/PSA connectors are on the roadmap — CSV import covers you today, and if there’s a specific tool you’d like connected natively, let us know.
Ownership and criticality
Section titled “Ownership and criticality”- Every asset is tied to a department (its accountability owner). Endpoints can also have an assigned user.
- Set each asset’s criticality — this feeds directly into how vulnerabilities are prioritised (a critical server outranks a spare laptop). See Vulnerability management.
Building a software inventory
Section titled “Building a software inventory”Import software → on the Asset Directory brings in the applications installed across your estate. This unlocks two things:
- Installed Software on each asset’s detail page — what is actually running where.
- Internal Asset vulnerability matching — 786 Cyber matches installed versions against the CVE database (CPE → NVD) and promotes the high‑confidence, genuinely exploitable results into your Internal Asset posture lane. See Vulnerability management.
Exporting an SBOM
Section titled “Exporting an SBOM”Export SBOM ↓ downloads your software inventory as a CycloneDX 1.5 file (sbom-cyclonedx-YYYY-MM-DD.json) — the standard format customers, insurers and assessors increasingly ask for. It needs a software inventory to have been imported first.
The SBOM covers what software you have and where. It does not yet include a vulnerability (VEX) section, and importing someone else’s SBOM is not yet supported.
Working with the directory
Section titled “Working with the directory”- Bulk actions — select many assets to update or delete together.
- CSV export — take your inventory out at any time.
- Risk column — each asset carries a unified risk score combining criticality with its open vulnerabilities and exposure. Criticality acts as a floor, so a business‑critical asset never reads as low risk just because nothing has been found on it yet.
- Recompute risk — recalculates those scores on demand. It also runs automatically overnight.
- The map beside the table is filter‑synced — narrow the table and the map narrows with it, so you can see the shape of whatever you’ve just filtered to. See Network connections.
- Deep links — dashboard and finding views can jump you straight to a highlighted asset.
The asset detail view
Section titled “The asset detail view”Open any asset to see its full record: category, owner, criticality, installed software, scan results, and its connections to other assets, which you add and manage from the Connections panel.
Some asset types have an extra panel:
Domains — web scanning
Section titled “Domains — web scanning”On a domain asset you can enable a web scan (within your plan’s quota) and then run it. Findings populate your Application & Web posture lane, and Download report ↓ gives you a branded PDF.
Domain assets can also be included in an active scan, which sends real attack payloads to confirm whether a vulnerability is exploitable. Active scanning now lives in Testing & Validation, is admin‑gated, and is worth telling your security team about first — see Testing & Validation.
Your organisation’s primary domain is also checked weekly for email authentication (SPF, DKIM, DMARC). Other domain assets aren’t checked for it. If your mail provider signs with a DKIM selector we wouldn’t guess, add it as DKIM selector on the asset for that domain; see External monitoring.
Cloud accounts — Cloud Security
Section titled “Cloud accounts — Cloud Security”On a cloud asset, the Cloud Security panel connects an AWS, Azure or GCP account for misconfiguration scanning. For AWS it’s one click: Launch Stack ↗ opens CloudFormation with a read‑only role template and your ExternalId pre‑filled — 786 Cyber never gets write access to your cloud, and never sees your credentials. Once connected, enable cloud scanning and run it; findings score in your Cloud Posture lane, with a PDF report available.
The full step‑by‑step is on its own page: Connect a cloud account (CSPM).
Devices — patching and end of life
Section titled “Devices — patching and end of life”On laptops, desktops, servers and network devices, the Patching and end of life panel shows the asset’s result on the 14-day patch check, the reasons behind it and any overdue vulnerabilities, plus whether its operating system is still supported by the vendor (with the end-of-support date and the vendor source), and any installed software past or near end of support.
Data, location and resilience
Section titled “Data, location and resilience”Each asset’s page has a Data, location and resilience panel. Select Edit to record:
- Classification: how sensitive the asset’s data is, using your organisation’s scheme (set it up under Settings → Organisation). Classification is separate from criticality. Criticality says how much the business needs the asset; classification says how much harm disclosure would cause. A public website can be critical but hold only public data.
- Personal data and special-category data (health, biometrics and similar): yes, no or not recorded. Not recorded is kept distinct from no, so a gap stays visible.
- Site, hosting countries and scope tags such as CDE (PCI), ePHI (HIPAA) or CJI (CJIS), to mark what’s in scope for a framework.
- Business function, plus RTO and RPO in hours: how quickly the asset must be back, and how much data you can afford to lose.
- For devices, the firmware version and end-of-support date. For software and cloud services, whether MFA is available, the licence status, and the end-of-support date.
You can also bring these in by CSV. The asset import has columns for classification and site (matched by name), personal data (yes/no), hosting countries, scope tags, end of support and RTO/RPO. On assets that already exist, an import only fills fields that are empty.
Hardening checks
Section titled “Hardening checks”Devices and network equipment (routers, firewalls, switches, servers, laptops and so on) have a Hardening checks panel. It records that the device was set up the way your secure configuration policy says it should be:
- Default passwords changed: the factory or sticker password was replaced before the device went into use.
- Remote administration disabled: the admin interface can’t be reached remotely. If it has to stay on, say why in the Note, and how it’s protected (for example, VPN and MFA only).
Each check is Yes, No or Not recorded, and keeps who checked and when. Saving an answer again records it under your name with today’s date.
You can also import the checks by CSV. The asset import has Default passwords changed and Remote administration disabled columns (yes/no) and an optional Hardening checked on date. Whoever runs the import is recorded as the person who checked. On assets that already exist, an import only fills checks that aren’t recorded yet.
These checks are your team’s own record, so 786 Cyber shows them as Declared, never Evidenced. In a Cyber Essentials assessment, questions A4.2, A4.9 and A5.3 suggest Device hardening checks under ✦ From 786 Cyber. Settings that can be read from the device itself, such as AutoRun, screen lock and the host firewall, are planned through Intune endpoint posture rather than typed in here.
Why it matters
Section titled “Why it matters”For everyday security: a complete, owned inventory is the foundation of everything else — patching, incident response, and knowing what’s exposed to the internet.
For compliance: an accurate asset inventory with owners and criticality is a named requirement in Cyber Essentials Plus, NCA ECC and SAMA CSF. Criticality and ownership also make risk assessments and audits far quicker to evidence.
Next: Network connections →