Reports
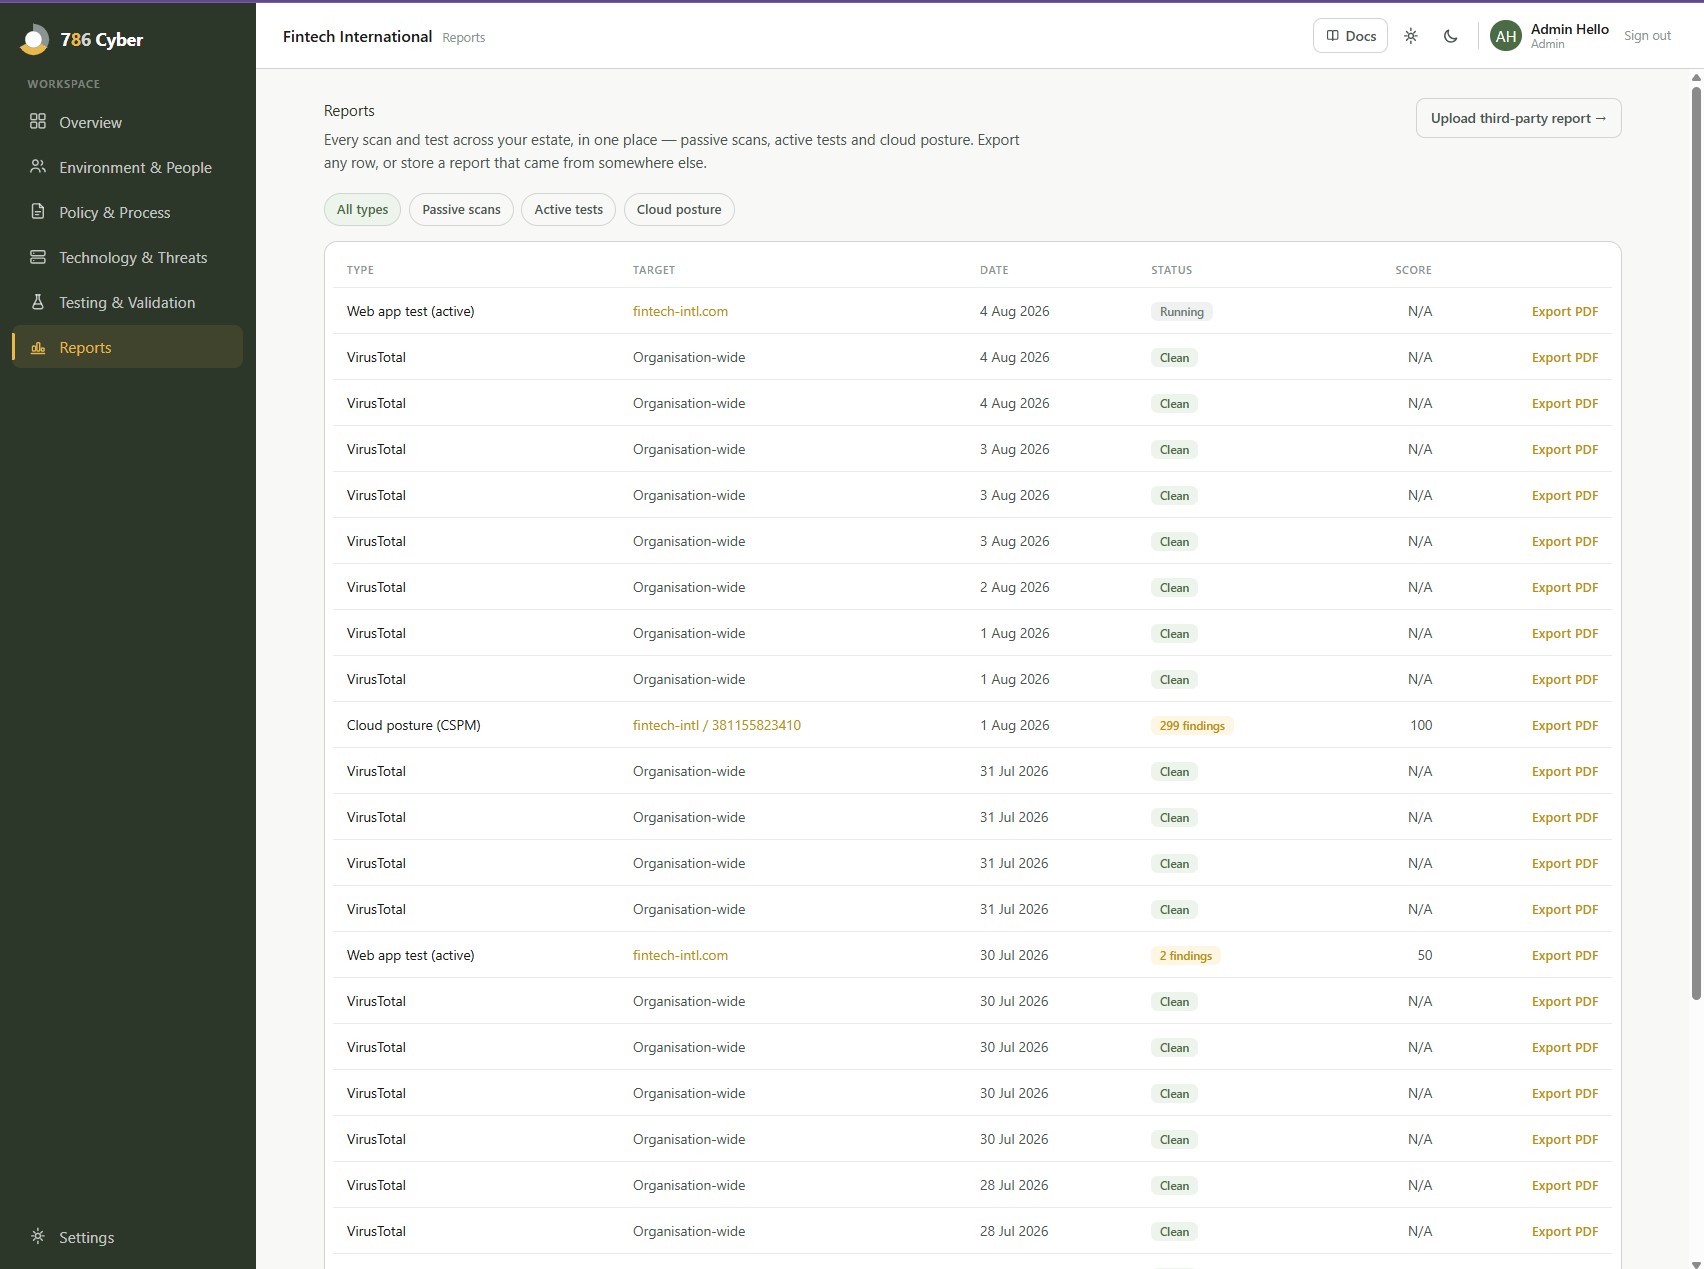
Reports (/reports) is a single, filterable table covering passive scans, active tests, and cloud posture scans — everything you’ve run, together in one place, rather than scattered across a dashboard tile, an asset panel, and separate scan-management screens the way it used to be.
What’s in the table
Section titled “What’s in the table”Each row shows the scan type, its target, the date it ran, its status, and its score where one applies — N/A, not a blank or a zero, for scan types that don’t produce a score. A failed scan always reads Failed, never “Clean” — a scan that didn’t finish tells you nothing, and the table won’t present it as though it did. The table is paginated and distinguishes “no scans have run” from “no scans match this filter,” since those call for different next steps.
Exporting
Section titled “Exporting”Each row has its own Export PDF action, using the same branded report generator used elsewhere in the platform (for example, the reports you can already download from a domain’s scan panel or a cloud account’s CSPM panel) — automatically varied by scan type, so you always get the right format for that row.
Third-party reports
Section titled “Third-party reports”If you’ve had a manual penetration test or another assessment done outside 786 Cyber, it lives in the Evidence Vault alongside the evidence you attach to your compliance answers, rather than as a separate upload inside Reports — a pentest report is evidence, and keeping one vault avoids maintaining two places for the same kind of document.
Why it matters
Section titled “Why it matters”For everyday security: one place to find any scan or test you’ve ever run, instead of remembering which dashboard it came from.
For compliance: a complete, exportable record of what’s been tested, when, and with what result is exactly the audit trail an assessor asks for — and bringing third-party reports into the same table means you’re not maintaining a separate folder of evidence outside the platform.
Next: Team & settings →